Make Your Own Contactless Thermometer
It all started from

Infrared thermometers are widely used in many work environments to determine an object’s surface temperature. Often times in a machine or electronic circuit, rising temperatures are one of the first signs to indicate that something is wrong. A quick non-contact check with an infrared thermometer can let you know what is happening with the temperature of a machine so you can shut if off before it causes permanent damage.
Infrared radiation is just another type of radiation that exists on the electromagnetic spectrum. We cannot see it but if you were to place your hand near something hot like a stove top, then you would be feeling the effects of infrared radiation. All objects emit energy in the form of infrared radiation. Most handheld thermometers use a lens to focus light from one
object onto a thermopile which absorbs the IR radiation. As more IR energy is absorbed, the hotter it gets and the heat level is converted into an electrical signal which is eventually converted to a temperature reading.
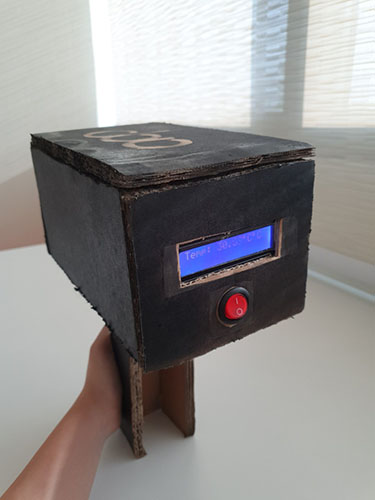
Sometimes described as a ‘thermometer gun’, the device is equipped with an infrared sensor that can quickly measure surface temperature without making any contact with a person’s skin. In recent years, it has become an important tool for countries scrambling to contain viral outbreaks. It was widely used to try to slow the spread of severe acute respiratory syndrome
(SARS) in China in the early 2000s and to curb the Ebola outbreak in West Africa a decade later.
With the recent COVID-19, contactless has become the ‘magical’ word amongst people. Where there used to be a simple handshake when people meet is now becoming just a wave of a hand. With the increasing need to take temperature on a regular basis, rises the need for contactless infrared thermometer, causing a global shortage on these thermometers.
Faced with this shortage, we decided to make our own…
This code will read the temperature capture from IR Temperature Sensor and output it onto 16 x 2 Liquid Crystal Display (LCD). The code was written in Arduino IDE, for Arduino Uno with atmega328 but can be adapted for other boards with ease.


Interested to find out more? Contact us at learn@kidscode.sg


